従来のコードからの変更箇所、
- 1. サーバーにFlaskではなく正式運用推奨のWSGIサーバーに変更
- 2. スレッド数をsingleからラズパイ5のコア数である4に変更(num_threads)
# work on Flask server
# server will be activated only when client request is occured
#
#
from flask import Flask, jsonify
import cv2
import numpy as np
import tflite_runtime.interpreter as tflite
from picamera2 import Picamera2
from waitress import serve

app = Flask(__name__)

# モデル・ラベル初期化
interpreter = tflite.Interpreter(model_path="efficientdet_lite0.tflite", num_threads=4)
interpreter.allocate_tensors()
input_details = interpreter.get_input_details()
output_details = interpreter.get_output_details()
with open("coco_labels.txt", "r") as f:
    labels = [line.strip() for line in f.readlines()]

# カメラ初期化
picam2 = Picamera2()
picam2.preview_configuration.main.size = (640, 480)
picam2.preview_configuration.main.format = "RGB888"
picam2.preview_configuration.align()
picam2.configure("preview")
picam2.start()

def preprocess_image(image):
    resized = cv2.resize(image, (320, 320))
    resized = resized[:, :, [2, 1, 0]]  # BGR→RGB
    return np.expand_dims(resized, axis=0).astype(np.uint8)

def postprocess_results(boxes, scores, classes, count, image_shape, labels):
    detections = []
    for i in range(count):
        if scores[i] > 0.4:
            ymin, xmin, ymax, xmax = boxes[i]
            left, right, top, bottom = (
                int(xmin * image_shape[1]),
                int(xmax * image_shape[1]),
                int(ymin * image_shape[0]),
                int(ymax * image_shape[0])
            )
            detections.append({
                'box': [left, top, right, bottom],
                'class_id': int(classes[i]),
                'score': float(scores[i]),
                'label': labels[int(classes[i])] if int(classes[i]) < len(labels) else f"id:{int(classes[i])}"
            })
    return detections

def detect_once():
    frame = picam2.capture_array()
    input_data = preprocess_image(frame)
    interpreter.set_tensor(input_details[0]['index'], input_data)
    interpreter.invoke()
    boxes = interpreter.get_tensor(output_details[0]['index'])[0]
    classes = interpreter.get_tensor(output_details[1]['index'])[0]
    scores = interpreter.get_tensor(output_details[2]['index'])[0]
    count = int(interpreter.get_tensor(output_details[3]['index'])[0])
    detections = postprocess_results(boxes, scores, classes, count, frame.shape, labels)
    return detections

@app.route('/detect', methods=['GET'])
def detect_route():
    detections = detect_once()
    return jsonify(detections)

if __name__ == '__main__':
	# when you limit access only from the local machine, use a loopback address instead of 0.0.0.0
    #app.run(host='0.0.0.0', port=5000)
    serve(app, host='0.0.0.0', port=5000)
時間測定用のスクリプトは、
#
# test script for image detect function(tflite server)
#

import requests
import time

if __name__ == '__main__':
    time1 = time.time()
    result = requests.get('http://rasp5.local:5000/detect').json()
    time2 = time.time()
    print('func1: {:.3f} sec'.format(time2 - time1))
    # 'label'が'person'を含んでいるかを判定
    person_detected = any(item['label'] == 'person' for item in result)

    if person_detected:
        print("Person detected!")
    else:
        print("No person detected.")
測定結果、
- 1. 最初のアクセスはmDNSが動作して遅くなる、以降はキャッシュが有効になるのでアドレス引きの時間は見えなくなる
- 2. マルチコアでの改善率は2.5倍ぐらい高速化だから、こんなもんかのレベルで良くてもせいぜい3倍ぐらいかと思っていたので
- 3. サーバーにWSGI使っても見かけレスポンス時間が早くなったとは感じない
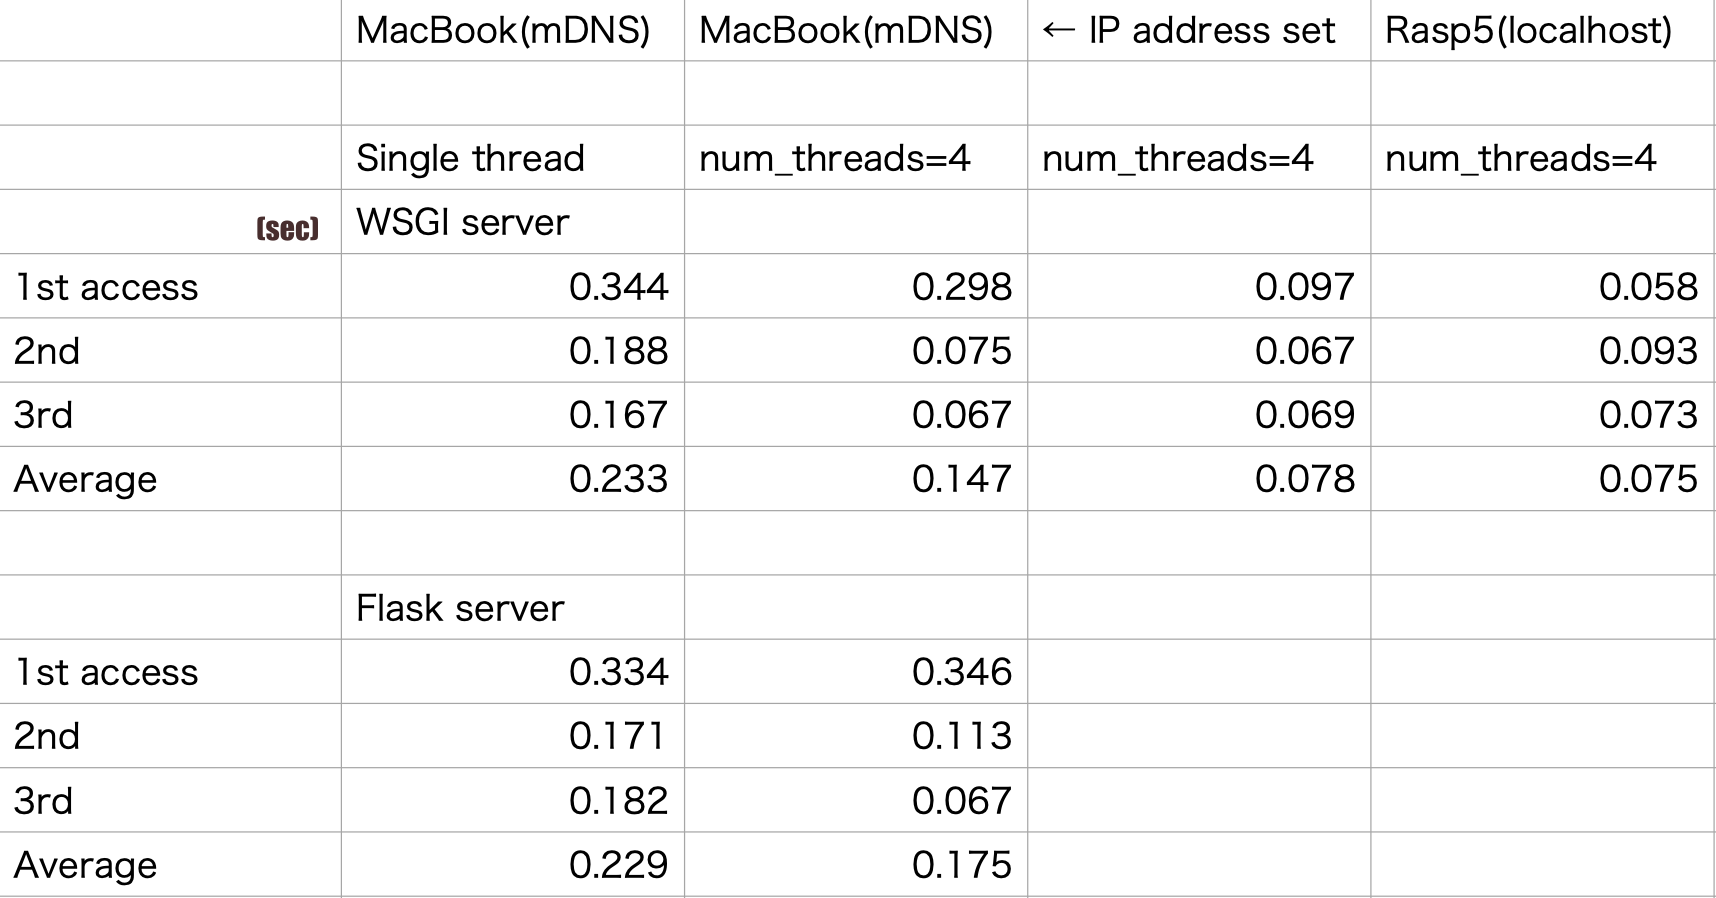
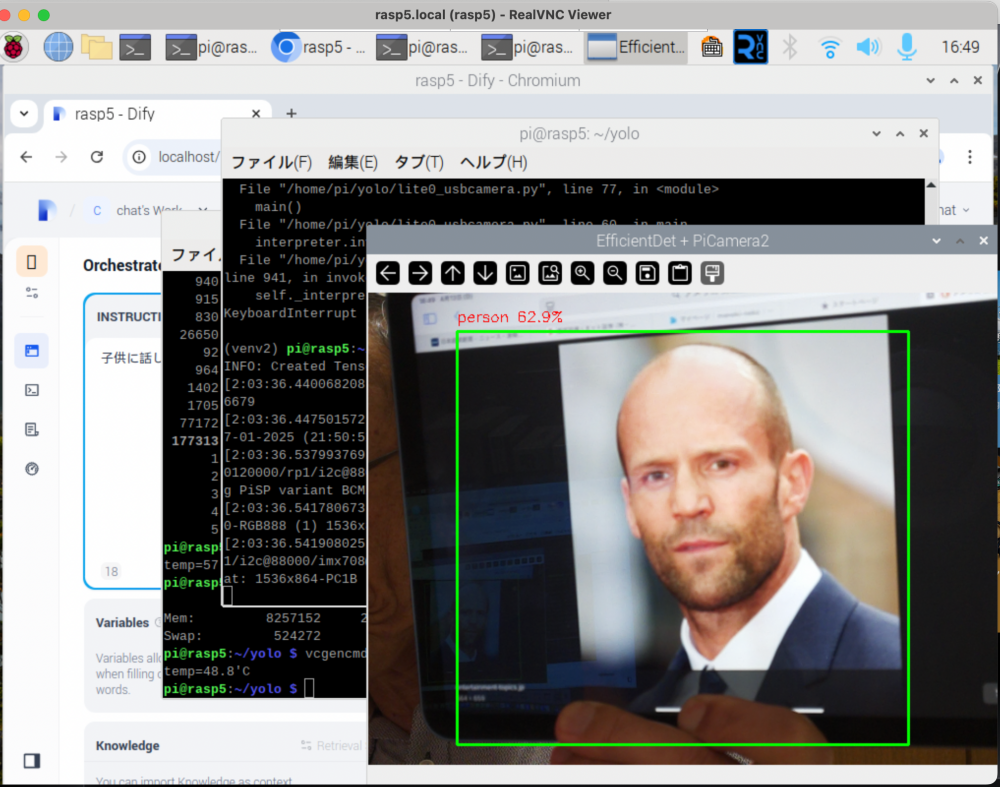
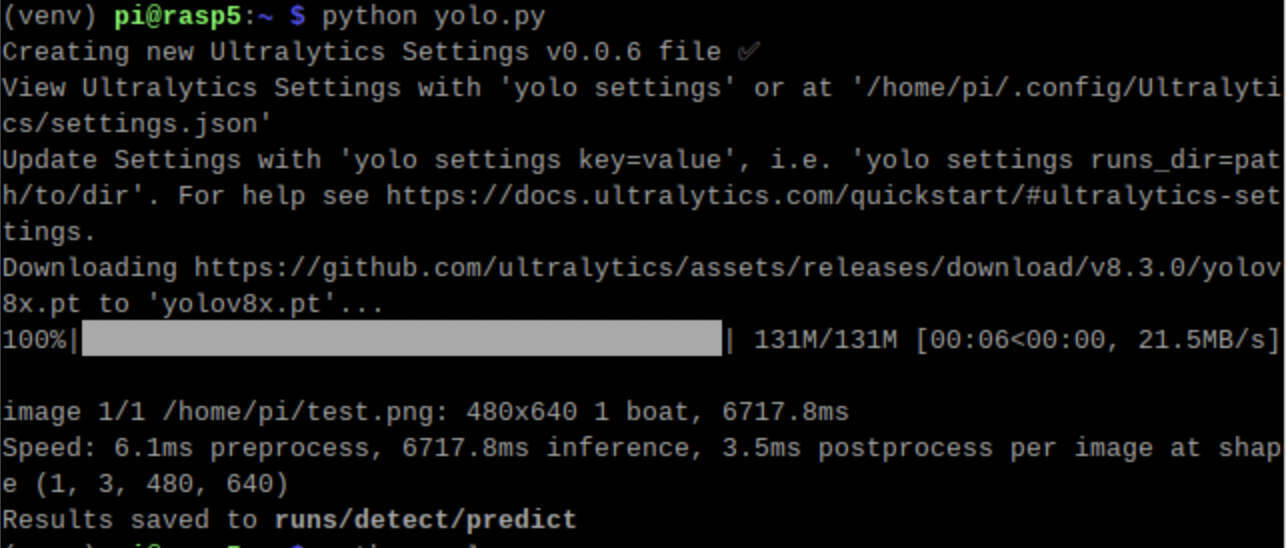
70m secぐらいでレスが返るということは、efficientdet_lite0.tfliteモデル使えばラズパイ5で十数フレームぐらいの動作は可能ということが言える
admin