すでにもう1年以上経過しましたが、
のフォローで、embassyを使ったサンプルプログラムでLチカを動かしてみた、とはいっても、ほぼ
https://qiita.com/Azi/items/422c654bb476e0abf118
の手順に則っています、Cargo.tomlのライブラリ版数を最新にしたのと、ソースファイルは通常通りsrcディレクトリ直下に配置しています
全体的に感じるのは、Lチカだけなのに環境構築は作業項目多いし、コードの分量も結構あるということで、MicroPyhtonやArduino言語に比較すると事前の手間がかかるということ
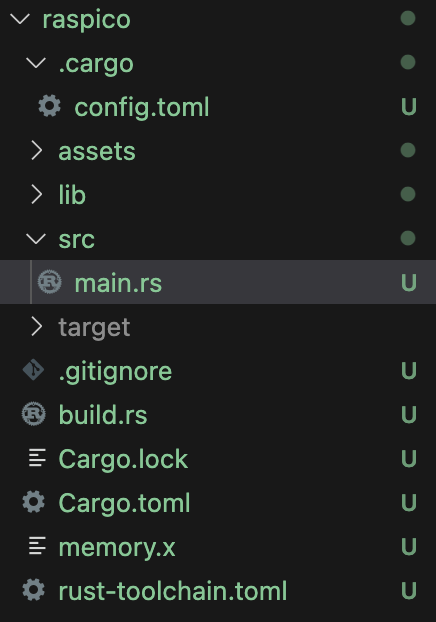
ディレクトリ構成はこんな感じで、config.tomlのrunnerはデバッガ使わないときには修正必要です
今回はデバッグプローブ使うのでデフォルト(対象部分だけ抜き出し)のまま、
[target.'cfg(all(target_arch = "arm", target_os = "none"))']
runner = "probe-rs run --chip RP2040"
build.rsの役割は、
//! This build script copies the `memory.x` file from the crate root into
//! a directory where the linker can always find it at build time.
//! For many projects this is optional, as the linker always searches the
//! project root directory -- wherever `Cargo.toml` is. However, if you
//! are using a workspace or have a more complicated build setup, this
//! build script becomes required. Additionally, by requesting that
//! Cargo re-run the build script whenever `memory.x` is changed,
//! updating `memory.x` ensures a rebuild of the application with the
//! new memory settings.
memory.xはテキストファイルで、picoのメモリの使い方(マッピング)を指定するファイルに見えます
pico用のサンプルプログラムは、
https://github.com/embassy-rs/embassy/tree/main/examples/rp
に他の機能用のサンプルも存在するのでやってみるか
気づきは、① ビルドのオプションで–releaseを指定してもバイナリサイズは変わらないということ、組み込み用のバイナリだとそうなるのかもしれない、② targetディレクトリのサイズが巨大であること、今回の事例でも2.3GB程度の容量になっています
いずれにしろサンプルプログラム動かしてみるのはまだしも、実際にオリジナルのコードを書いたときにはデバッグ環境が必須だから、そこも当たり始めないと組み込みでは使い物にはならない
一番ポピュラーなのはラズパイ財団から出ているデバッグプローブを使うことだろう、今回はバイナリの転送にデバッグプローブ使ってるだけですが、
https://www.switch-science.com/products/8708
admin

